Showing posts with label JIRA. Show all posts

Wednesday, November 4, 2020

JIRA Basic - Create Users

 You can create users manually or invite them adding email. 

Here we going to show the steps to add a user manually. you need to log in as an Administrator.

1. Go to "Jira Administration" --> User  Management


you will get a comprehensive window like below where you can filter, Invite  users. To add manually click "Create"  in top right corner.


Create User manually


2. fill details in the "Create New User" panel and click "Create User"


Create New User


JIRA Basic - Create Sprint

 To create a sprint you probably need a project and some items in the backlog.

  1. To create project refer https://cgenit.blogspot.com/2020/11/jira-basic-create-project.html
  2. To create Backlog items https://cgenit.blogspot.com/2020/11/jira-basic-create-backlog-items.html

Let's create a Sprint.

Select the project you need and go to backlog. In the initial stage this would like this where only few items in the backlog.


1. Go to you project. Select Backlog. Click "Create Sprint"


you can see brand new sprint has been created with name "TDS1 Sprint1".

  • "TDS1" is the key of the project. 
  • "Sprint1" default name for First Sprint.


2. Set goals for the Sprint.

  • Click "Elispe" in top right corner to add goals


Note: If you do not want, you can delete your Sprint option also available.

  • "test goal 1" added. if you need you can edit this.


2. Add issues to Sprint.

  • Click "Create Issue" to add a new Issue.
  • else you can drag and drop item from backlog items in the bottom.
Before drag and drop Issue from Backlog or adding new issues by clicking "Create issue"


After drag and drop items. Here i have dragged "task 1" from backlog

Drag "task 1" from backlog


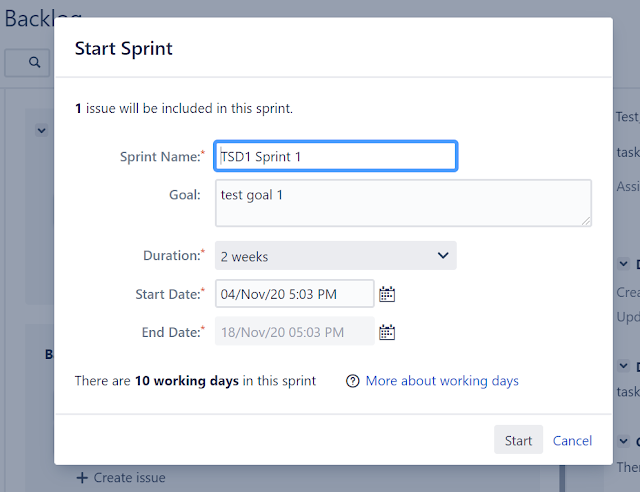
3. Now you have items. Click "Start Sprint" to start the Sprint.
    Here you can set values again for the 
  • Sprint Name
  • Goal
  • Duration
  • Start date and end date


Start Sprint -  Set values


4. Once you start, you can see your Sprint under "Active Sprints"

Active Sprints


5. "TSD1 Sprint1" is the active sprint and as I have added only one task with name "task 1"
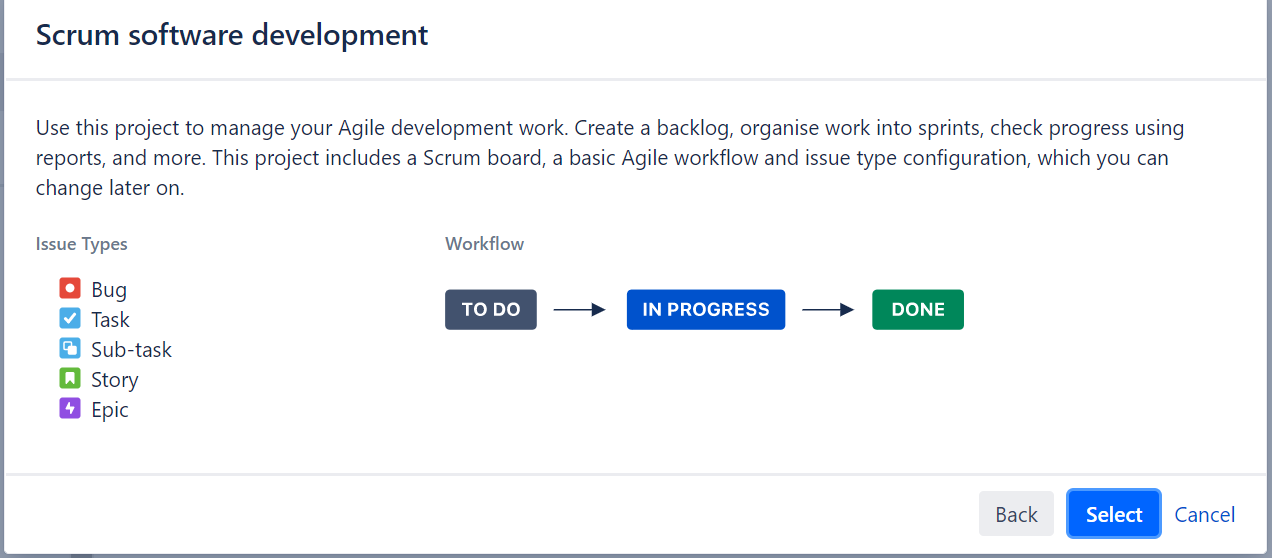
When I create the project, I had the basic flow with stages
  • ToDo
  • In Progress
  • Done
As we are still in start point, our "task 1" is in "TO DO" stage.

JIRA Basic - Create Backlog items

 Prior to create backlog items, you need to have a project. To create a project , please refer https://cgenit.blogspot.com/2020/11/jira-basic-create-project.html

Select the project you need. Then you can see the "Backlog" in right pane. I am selecting the "Test_ScrumSoftDevPrj1" - Scrum Software development type project.


1. Click "Create" in the top ribbon. You will basically get a window like below.


Here you will have few Issue Types

  • Task
  • Story
  • Bug
  • Epic
  • IT Help
  • Service Request
  • Service Request With Approvals

Don't worry , if you do not have all the items. Most probably you will have Task, Story, Bug, Epic.


Issue Types


2. Start adding issues of each types

2.1 Add Task

Select "Task" from "Issue Type" and fill details and Click "Create" or "Create another"

same way you can create Story, Epic

Once you create Issues, they will be shown in the Backlog.

It's better to create an Epic cause when you create Bug, Story .. then you can assign it relevant Epic.

Here I have 

create Task1, Epic1, Story1,bug1. 

Assign story1 and bug1 under epic1


Now you have items, then as next step you can create a sprint.

you would see this as message in newer JIRA versions.


JIRA Basic - Create Project - Scrum Software development

Create Project

1.       Project à Create Project


You will have various types of Projects

  • ·       Software
  • ·       Service Desk
  • ·       Business


Under Software

  • Scrum Software development
  • Kanban Software development
  • Basic Software development


Let's create a "Scrum Software development"

Scrum Software development

Select "Scrum Software development" and click "Next"


Go through the navigation


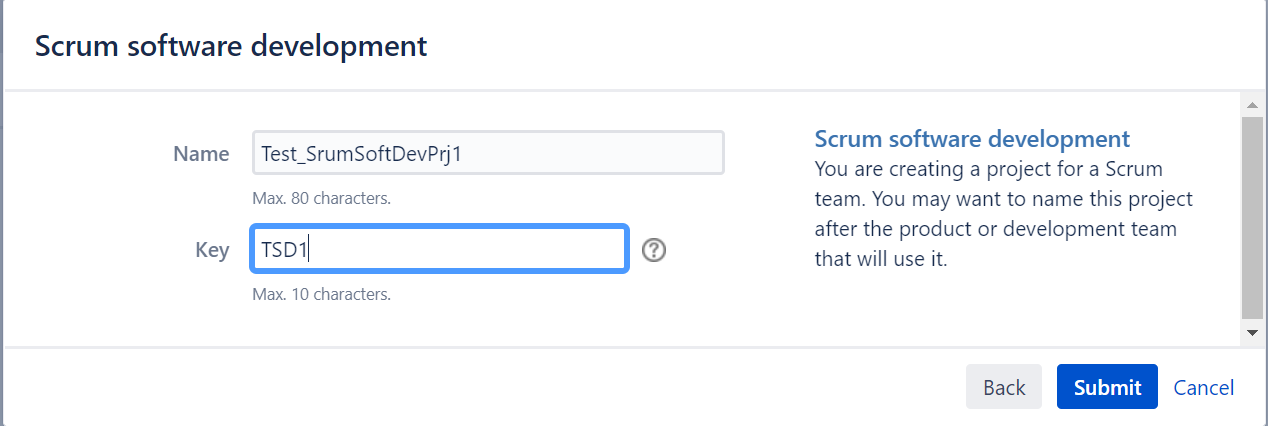
Give a name for Project and a Key.


Click "Submit"

You will get initial Dishoard like below.